Ultimate Guide: When to Wrap Brisket for Tender Meat
Cooking brisket can be a labor of love, especially when aiming for that perfect balance of tenderness and flavor. One key step in this process is knowing when to wrap brisket. Wrapping it at the right time can make all the difference in achieving juicy, delicious meat.
Generally, the best time to wrap your brisket is when it reaches an internal temperature of around 160°F to 170°F and has developed a nice bark. Whether you’re using foil or butcher paper, this guide will walk you through everything you need to know to master this crucial step and impress your friends and family with your barbecue skills.
Why Wrap Brisket?
Wrapping brisket is a technique that many pitmasters swear by to achieve the perfect barbecue. Here are some key reasons why wrapping your brisket is beneficial:
1. Retaining Moisture
Brisket is a tough cut of meat that requires long cooking times to break down its connective tissues and become tender. Wrapping the brisket helps to trap moisture inside, preventing it from drying out during the extended cooking process. This results in a juicier, more succulent final product.
2. Speeding Up the Cooking Process
Wrapping brisket can significantly reduce the overall cooking time. When you wrap the meat, it creates a sort of mini-oven around it, which can help to cook the brisket more quickly. This is especially useful if you’re on a tight schedule but still want to achieve that tender, delicious brisket.
3. Enhancing Flavor and Texture
Wrapping helps to lock in the flavors from any seasonings, rubs, or marinades you’ve applied to the brisket. Additionally, it can enhance the texture of the bark (the outer crust of the meat). While wrapping can slightly soften the bark, it often leads to a more uniform and flavorful crust that many people prefer.
4. Avoiding the Stall
The stall is a phenomenon where the internal temperature of the brisket plateaus for several hours during cooking. This can be frustrating and extend your cooking time significantly. Wrapping the brisket helps to push through the stall by insulating the meat and maintaining a steady temperature.
When Should You Wrap Brisket?

Knowing the right time to wrap your brisket is crucial for achieving the best results. Here are some guidelines to help you determine the perfect wrapping time:
Internal Temperature
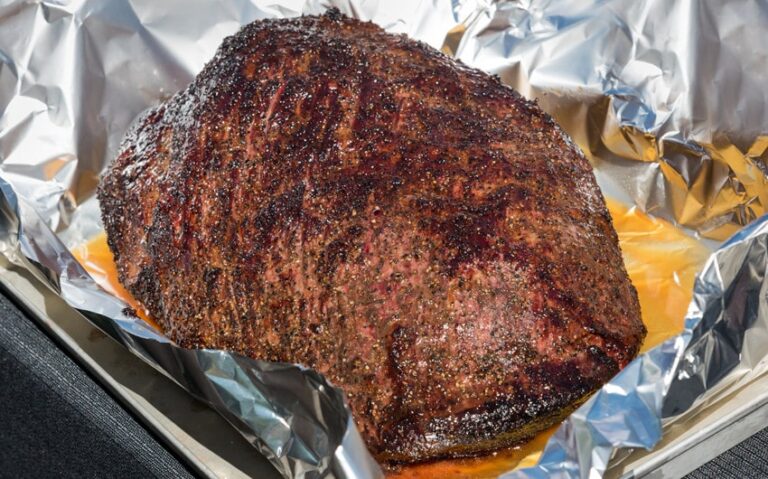
A common rule of thumb is to wrap the brisket when it reaches an internal temperature of around 160°F to 170°F. At this point, the brisket has developed a good amount of bark and is ready to be wrapped to continue cooking without drying out.
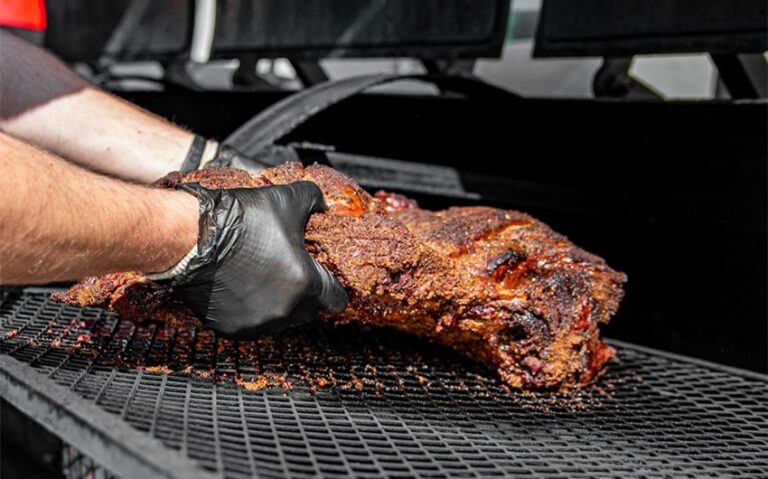
Bark Formation
The bark is the flavorful crust that forms on the outside of the brisket during smoking. It’s important to wrap the brisket once the bark has set. This usually occurs when the internal temperature is in the 160°F to 170°F range, but it can also be judged by the appearance and texture of the bark. It should be dark, firm, and not easily scraped off with your finger.
Time Considerations
If you’re working with a specific timeline, you might choose to wrap the brisket based on how long it has been cooking. Typically, wrapping occurs after the first few hours of smoking, once the brisket has absorbed enough smoke flavor and the bark has formed. This can be around the 5-6 hour mark, but it varies depending on the size of the brisket and the cooking temperature.
Visual Cues
Experienced pitmasters often rely on visual cues to determine when to wrap their brisket. Look for a rich, dark color on the bark, and ensure that it’s not too moist or too dry. The brisket should have a slight sheen from the rendered fat, indicating that it’s ready to be wrapped.
Flexibility and Personal Preference
Ultimately, the best time to wrap brisket can come down to personal preference and experimentation. Some pitmasters prefer to wrap earlier to ensure maximum moisture retention, while others might wait a bit longer to develop a thicker bark. Trying different timings and techniques will help you find what works best for your taste and cooking style.
Methods of Wrapping
There are several methods you can use to wrap your brisket, each with its own set of advantages and disadvantages. Understanding these methods will help you choose the best one for your cooking style and desired results.
1. Foil Wrap (Texas Crutch)
Pros: The foil wrap, commonly known as the Texas Crutch, is popular for its ability to speed up the cooking process and retain moisture. It creates a tight seal around the brisket, preventing any steam from escaping and helping the meat stay juicy and tender.
Cons: The downside of using foil is that it can sometimes cause the bark to become soft and less crispy due to the steam trapped inside the wrap.
Step-by-Step Guide:
- Lay out a large sheet of heavy-duty aluminum foil.
- Place the brisket in the center of the foil.
- Wrap the foil tightly around the brisket, ensuring there are no gaps or openings where steam could escape.
- Return the wrapped brisket to the smoker or oven to continue cooking until it reaches the desired internal temperature.
2. Butcher Paper Wrap
Pros: Butcher paper is a favorite among many pitmasters because it allows the brisket to breathe while still retaining moisture. This helps maintain a nice bark while keeping the meat moist. The paper absorbs some of the grease and juices, creating a unique texture and flavor profile.
Cons: Butcher paper doesn’t retain moisture as well as foil, which means the cooking process might take a bit longer. Additionally, it can be trickier to handle because it’s not as sturdy as foil.
Step-by-Step Guide:
- Lay out a large sheet of butcher paper, typically 2 to 3 times the length of the brisket.
- Place the brisket in the center of the paper.
- Fold the paper over the brisket, tucking the edges tightly to ensure a snug fit.
- Secure the wrap by folding the ends under the brisket.
- Return the wrapped brisket to the smoker or oven to finish cooking.
3. No Wrap Method
When to Use: This method is best for those who prefer a very crispy bark and are willing to accept a longer cooking time.
Pros: The no wrap method results in an exceptionally crispy and well-developed bark. It allows the meat to be exposed to smoke and heat for the entire cooking process, enhancing the smoky flavor.
Cons: The meat can dry out more easily, and the cooking time is significantly longer compared to wrapped methods.
Step-by-Step Guide:
- Simply continue cooking the brisket uncovered.
- Monitor the internal temperature and moisture levels closely to prevent the meat from drying out.
- Adjust the heat and cooking time as needed to achieve the desired texture and flavor.
Wrapping Techniques
Mastering the techniques of wrapping brisket is crucial for ensuring the best possible results. Here are some detailed tips and methods to help you wrap your brisket like a pro:
1. Using the Right Materials
Foil: Always use heavy-duty aluminum foil to prevent tearing and ensure a tight seal. Standard kitchen foil can be too thin and prone to punctures, which can lead to leaks and loss of moisture. Heavy-duty foil provides the necessary durability to withstand the long cooking process.
Butcher Paper: Use high-quality, food-grade butcher paper designed for cooking. Avoid waxed or coated papers, as they are not suitable for smoking and can produce unwanted chemicals when heated. Butcher paper specifically made for barbecue will provide the right balance of strength and breathability.
2. Creating a Tight Seal
Foil Wrap: When using foil, make sure to wrap the brisket tightly and securely. Fold the edges over multiple times to create a strong seal that prevents steam from escaping. This tight seal is essential for retaining moisture and speeding up the cooking process. If using foil, you can double wrap for extra security against leaks.
Butcher Paper Wrap: For butcher paper, wrap the brisket snugly and fold the edges carefully to avoid any gaps. The paper should be tight enough to hold the juices but loose enough to allow some steam to escape, which helps maintain the bark’s texture. Practice makes perfect, as handling butcher paper can be trickier than foil due to its flexibility.
3. Double Wrapping
For added security, especially with larger briskets or if you notice any tears, double wrapping can be beneficial. Use a second layer of foil or butcher paper to ensure the wrap remains intact throughout the cooking process. Double wrapping is particularly useful for extended cooking times or when cooking in high-heat environments.
4. Monitoring Temperature
After wrapping, it’s essential to continue monitoring the internal temperature of the brisket. Use a reliable meat thermometer to check the temperature periodically. This helps ensure you don’t overcook the brisket and allows you to make adjustments as needed. Aim for a target internal temperature of around 200°F to 205°F for optimal tenderness.
5. Resting Wrapped Brisket
Once the brisket reaches the desired internal temperature, remove it from the heat but keep it wrapped. Let the brisket rest for at least an hour, preferably in a cooler or insulated container. Resting allows the juices to redistribute throughout the meat, resulting in a more flavorful and tender brisket. This step is crucial for achieving the best possible texture and flavor.
Unwrapping and Resting
Unwrapping and resting your brisket are crucial steps to ensure it reaches its peak flavor and tenderness. Here’s a more detailed look at how to do them correctly.
How to Rest Brisket
- Keep It Wrapped: After reaching the desired internal temperature (typically around 200°F to 205°F), remove the brisket from the smoker or oven but keep it wrapped in foil or butcher paper. This helps retain the heat and moisture during the resting period.
- Insulate the Brisket: Place the wrapped brisket in an insulated cooler or wrap it in a thick towel to further retain heat. This method is often referred to as “holding” the brisket, and it can keep the meat warm for several hours.
- Rest Time: Ideally, you should let the brisket rest for at least one hour. For the best results, consider resting it for 2 to 4 hours. This extended resting time allows for maximum juice redistribution and flavor development.
- Checking Temperature: If you’re concerned about the brisket cooling too much, you can use a thermometer to check the internal temperature during the resting period. The goal is to keep it above 140°F, which is the safe serving temperature.
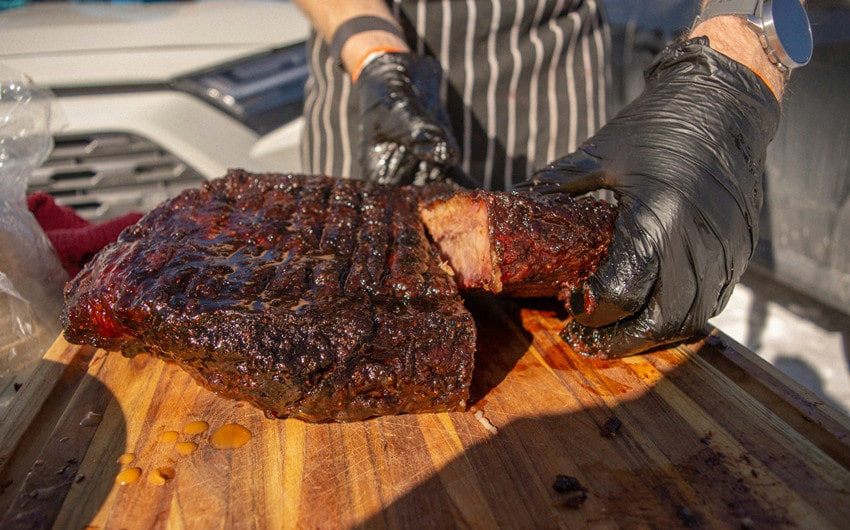
Unwrapping the Brisket
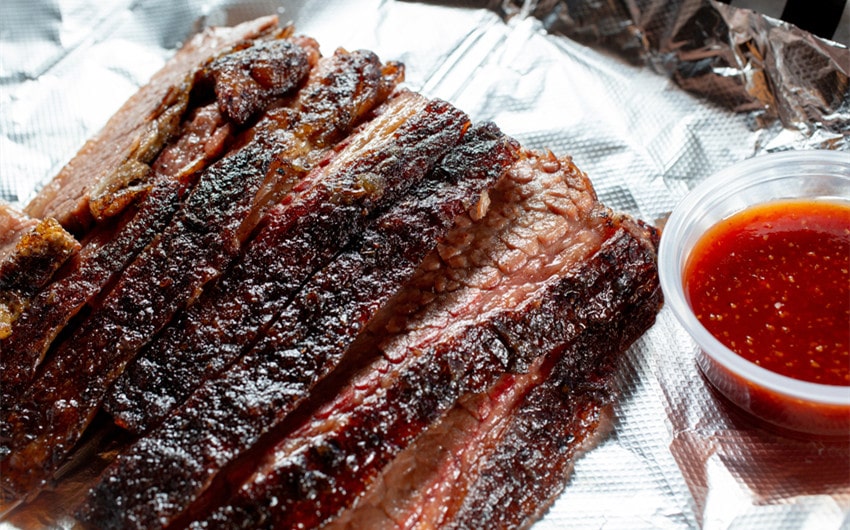
- Careful Unwrapping: When you’re ready to serve, carefully unwrap the brisket. Be cautious of any accumulated juices that might spill out. You can save these juices to drizzle over the sliced brisket for added moisture and flavor.
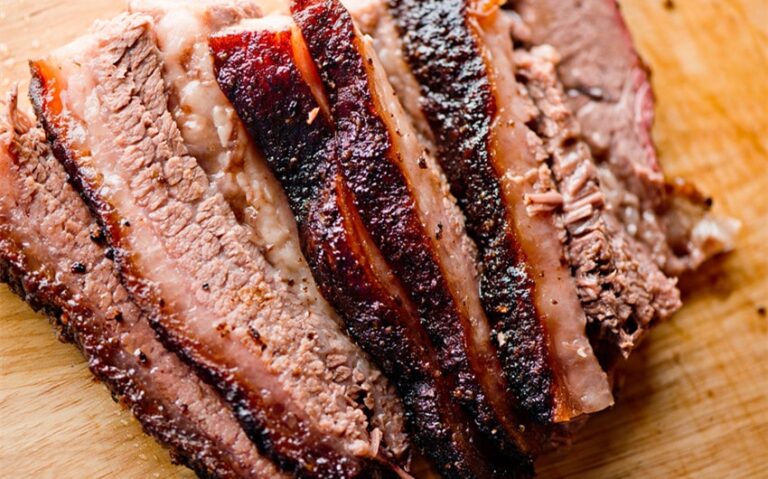
- Slice Against the Grain: To achieve the most tender slices, make sure to slice the brisket against the grain. This technique shortens the muscle fibers, making each bite more tender.
Common Questions and Troubleshooting
Cooking brisket can be a challenging task, and it’s common to encounter issues along the way. Here are some frequently asked questions and troubleshooting tips to help you navigate any problems and ensure your brisket turns out perfectly.
1. Why Is My Brisket Taking So Long to Cook?
Brisket can take longer to cook if there are temperature fluctuations in your smoker or oven, which can prevent the meat from reaching the desired internal temperature. Additionally, larger and thicker briskets naturally require more time. The “stall” phase, where the internal temperature plateaus, is also a common occurrence that can prolong cooking.
Solutions: Ensure your smoker or oven maintains a steady temperature between 225°F and 250°F by using a reliable thermometer. Plan for extra cooking time, especially for larger briskets, and be patient during the stall phase. If necessary, wrap the brisket in foil or butcher paper to help push through the stall faster.
2. What If My Brisket Is Cooking Too Quickly?
Cooking at a higher-than-recommended temperature can cause the brisket to cook too quickly. Additionally, thinner briskets will naturally cook faster than thicker ones.
Solutions: Lower the cooking temperature to the recommended range of 225°F to 250°F. Monitor thinner briskets closely and be prepared to adjust the cooking time. Wrapping the brisket earlier can also help regulate the cooking speed and retain moisture.
3. Why Is My Brisket Dry?
Dry brisket is often a result of overcooking, which causes the meat to lose too much moisture. Cooking uncovered for too long or at too high a temperature can also dry out the meat. Briskets with less marbling are more prone to drying out, as the fat helps keep the meat moist.
Solutions: Use a reliable meat thermometer to avoid overcooking. Pull the brisket from the heat once it reaches the target internal temperature of 200°F to 205°F. Wrap the brisket at the right time to retain moisture, ensuring a tight seal with foil or butcher paper. Choose briskets with good marbling to help maintain moisture.
4. How Do I Develop a Good Bark on My Brisket?
Poor bark can result from too much moisture during cooking, often due to wrapping the brisket too early or a humid smoking environment. Incorrect seasoning can also affect bark formation.
Solutions: Wrap the brisket only after it has reached an internal temperature of 160°F to 170°F and developed a dark, firm crust. Apply a generous amount of dry rub to create a flavorful crust. Use spritzing sparingly to avoid excess moisture and aim for a steady, thin layer of smoke.
5. What If My Brisket Is Tough?
Tough brisket is usually due to undercooking, where the internal temperature is not high enough to break down connective tissues. Insufficient resting time can also result in tougher slices, as the juices haven’t redistributed.
Solutions: Ensure the brisket reaches an internal temperature of 200°F to 205°F for optimal tenderness. Let the brisket rest for at least an hour, preferably longer, to allow the juices to redistribute and the meat to relax, resulting in a tender, flavorful brisket.
6. Can I Save a Dry or Overcooked Brisket?
Dry or overcooked brisket can occur if the internal temperature exceeds the target range or if the meat is exposed to heat for too long. However, there are ways to salvage it.
Solutions: To rehydrate the meat, add moisture by wrapping the brisket in foil with a bit of beef broth or water and placing it back in the oven or smoker at a low temperature for a short period. Alternatively, slice the brisket thinly and serve it with a flavorful barbecue sauce. You can also shred the brisket and use it in dishes like tacos, sandwiches, or chili, where additional ingredients and sauces can help mask any dryness.