Smoking Brisket: Fat Side Up or Down? Find Your Best Method
Cooking the perfect brisket is a true art form, loved by BBQ enthusiasts everywhere. One of the most debated questions is whether to cook brisket fat side up or down. The answer is fat side up. This method allows the fat to render and baste the meat, keeping it juicy and flavorful.
Whether you’re new to smoking brisket or looking to perfect your technique, understanding why fat side up works best can help you achieve delicious, tender results every time. Let’s dive into the reasons and tips for mastering this BBQ classic.
What is the Fat Cap?
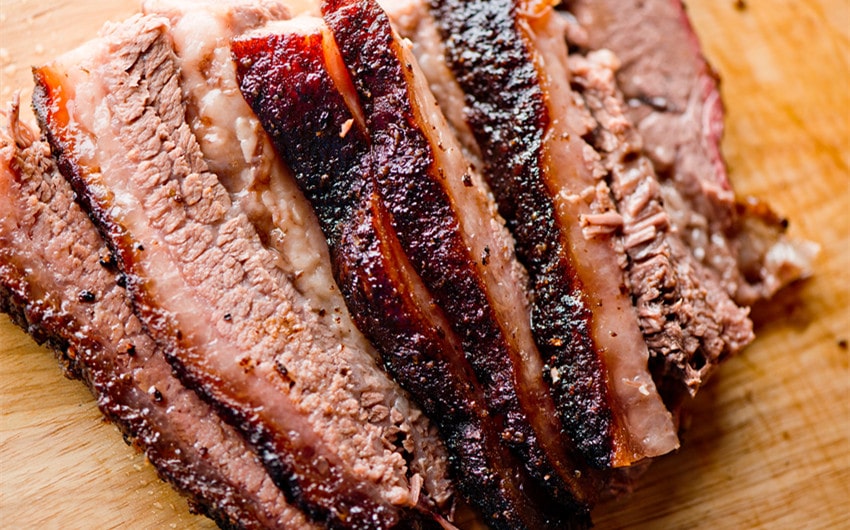
The fat cap is the thick, fatty layer on top of the brisket. This fat helps to keep the meat moist during long cooking times and can add flavor as it renders and melts into the meat. The cap varies in thickness across different parts of the brisket, with some areas being thicker than others.
The thickness and distribution of the fat cap can vary significantly. A thick, even fat cap can help protect the meat from drying out during cooking. Conversely, an uneven fat cap might require some trimming to ensure even cooking and flavor distribution.
Should You Remove the Brisket Fat Cap?
Removing the fat cap is an approach some BBQ enthusiasts take, but it comes with its own set of pros and cons. On the one hand, removing the fat cap can make the brisket leaner, which might be preferred for health reasons.
Additionally, without the fat cap, more surface area of the meat is exposed, potentially leading to a better bark formation. The bark is the flavorful, crusty exterior that many BBQ lovers seek and can be more pronounced without the fat barrier.
On the other hand, the fat cap plays a crucial role in keeping the brisket moist during the long cooking process. Removing it can increase the risk of drying out the meat, especially with direct heat. Moreover, the fat cap renders and infuses flavor into the brisket, enhancing its overall taste.
Instead of completely removing the fat cap, many recommend trimming it to about 1/4 to 1/2 inch thick. This allows enough fat to render and baste the meat, ensuring it stays moist and flavorful. Ultimately, the decision to remove or trim the fat cap depends on your cooking method and personal preferences.
Why Cook Brisket Fat Side Down?
Cooking brisket fat side down is favored by many BBQ enthusiasts for several compelling reasons. This method can provide several benefits, particularly when cooking with direct heat.
Protection from Direct Heat
One of the main advantages of cooking brisket fat side down is that the fat cap acts as a protective barrier between the meat and the direct heat source. This shield helps prevent the meat from drying out and burning, which is especially important during long, slow cooking processes. The fat cap takes the brunt of the heat, allowing the meat to cook evenly and retain its moisture.
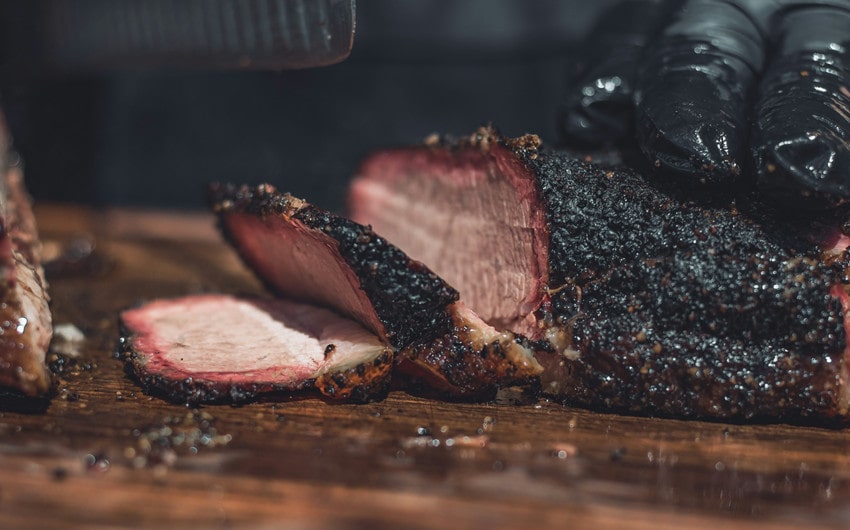
Better Bark Formation
With the meat directly exposed to the heat and smoke, cooking fat side down often results in a thicker and more flavorful bark. The bark is the coveted, crusty exterior that forms on the brisket during cooking, adding a delightful texture and rich flavor. Without the fat cap in the way, the rub and smoke can penetrate the meat more effectively, enhancing the overall taste and appearance.
Even Cooking
Cooking fat side down can also contribute to more even cooking. The fat cap on the bottom helps insulate the meat, distributing heat more evenly across the brisket. This can be particularly beneficial in smokers or grills where the heat source is directly beneath the meat. By using the fat cap as a buffer, the meat is less likely to experience hot spots and uneven cooking.
When Should You Cook Brisket Fat Side Up?
Cooking brisket fat side up is sometimes preferred when the heat source is from above. This method can help protect the meat from direct heat and still allow the fat to render properly.
When the heat source is from above, such as in some smokers or ovens, cooking the brisket fat side up can provide a protective barrier between the intense heat and the meat. This positioning helps prevent the meat from drying out while allowing the fat to render down over the brisket, potentially adding some moisture and flavor to the surface.
However, this method is most effective in specific cooking setups where the primary heat comes from above rather than below.
Should You Flip the Brisket During Cooking?
Flipping the brisket during cooking is a topic of debate among BBQ enthusiasts. However, there is generally no need to flip the brisket if you cook it fat side down. Flipping the brisket can disrupt the cooking process and lead to inconsistent results.
When you cook brisket fat side down, the fat cap protects the meat from direct heat, allowing it to cook evenly without the need for flipping. Flipping the brisket can cause the meat to lose moisture each time the lid is opened, leading to a drier end product.
Additionally, each flip can disrupt the formation of a consistent bark, which is a prized feature of well-cooked brisket. By keeping the brisket fat side down throughout the entire cooking process, you ensure a more stable cooking environment, maintain consistent heat, and develop a better bark, ultimately leading to a more tender and flavorful brisket. Therefore, there is no need to flip the brisket during cooking.
Does Fat Braise the Meat When Cooked Fat Side Up?
Contrary to popular belief, cooking brisket fat side up does not effectively braise the meat. While the idea is that the melting fat will baste the meat, the reality is that the fat often runs down the sides and does not penetrate the meat itself. This means the basting effect is minimal, and the rendered fat doesn’t significantly enhance moisture or flavor.
When cooking brisket fat side up, the fat flows down the exterior, missing the meat’s surface that needs moisture most. Unlike water-based liquids, rendered fat stays on the surface and does not seep into the meat fibers. This means the expected braising effect is not achieved, and the interior of the brisket does not benefit significantly from the fat.
Additionally, the fat cap can act as a barrier, preventing seasoning and smoke from penetrating the meat, leading to less flavor. Cooking brisket fat side down allows the fat cap to protect the meat from direct heat, ensuring more even cooking and better bark formation while letting the meat absorb flavors and stay moist.
Additional Tips for Cooking Perfect Brisket
Cooking the perfect brisket requires more than just choosing between fat side up or down. Here are four additional tips to help you achieve brisket perfection.
1. Maintain a Consistent Temperature
Consistent temperature is crucial for cooking brisket evenly and thoroughly. Brisket requires a long, slow cook at a steady temperature to break down the tough connective tissues and render the fat properly.
Tip: Aim to keep your smoker or grill at a steady 225°F to 250°F. Use a reliable thermometer to monitor both the internal temperature of the brisket and the ambient temperature inside your cooking device. Adjust vents and fuel as needed to maintain a consistent temperature.
2. Use a Good Rub
Seasoning your brisket with a flavorful rub can enhance its taste significantly. A good rub not only adds flavor but also helps form a delicious crust or bark on the exterior of the meat.
Tip: Use a rub that complements the natural flavors of the brisket. Common ingredients include salt, black pepper, paprika, garlic powder, onion powder, and brown sugar. Apply the rub generously to all sides of the brisket and let it sit for a few hours or overnight in the refrigerator to allow the flavors to penetrate the meat.
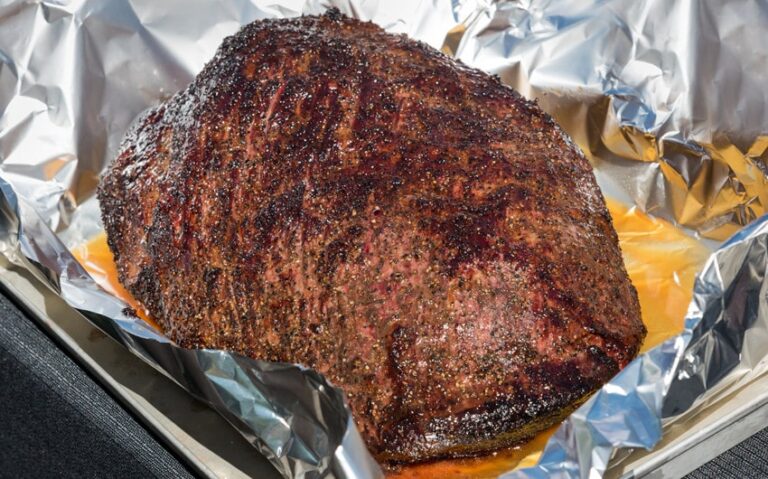
3. Consider Wrapping the Brisket
Wrapping the brisket during the cooking process can help retain moisture and speed up the cooking time. This method, often referred to as the “Texas Crutch,” involves wrapping the brisket in foil or butcher paper once it reaches an internal temperature of around 160°F.
Tip: When the brisket reaches the stall (usually around 160°F), where the internal temperature stops rising, wrap it tightly in foil or butcher paper. Continue cooking until the brisket reaches the desired internal temperature of 195°F to 205°F. Wrapping helps prevent the meat from drying out and can produce a more tender brisket.
4. Rest the Brisket
Resting the brisket after cooking is a crucial step that allows the juices to redistribute throughout the meat, resulting in a more flavorful and moist final product.
Tip: Once the brisket reaches the desired internal temperature, remove it from the heat and let it rest for at least 30 minutes. Tent the brisket with aluminum foil to keep it warm. For larger cuts, consider resting for up to an hour. Resting ensures that the juices are evenly distributed, making the brisket easier to slice and more enjoyable to eat.
Common Mistakes to Avoid
Cooking a perfect brisket is an art that requires attention to detail and patience. Here are some common mistakes to avoid to ensure your brisket turns out tender, juicy, and flavorful.
1. Inconsistent Cooking Temperature
One of the most critical factors in cooking brisket is maintaining a consistent temperature. Fluctuations in temperature can lead to uneven cooking, making parts of the brisket overcooked while other parts remain undercooked.
Solution: Use a reliable smoker or grill that can maintain a steady temperature. Consider investing in a good quality thermometer to monitor both the internal temperature of the meat and the ambient temperature inside your cooking device. Aim to keep the temperature between 225°F and 250°F throughout the cooking process.
2. Over Trimming the Fat Cap
While trimming the fat cap is important for ensuring even cooking and avoiding excess greasiness, over trimming can be detrimental. Removing too much fat can result in a dry and less flavorful brisket.
Solution: Trim the fat cap to an optimal thickness of about 1/4 to 1/2 inch. This thickness allows the fat to render and baste the meat while still providing a protective barrier against direct heat. Use a sharp knife and take your time to achieve an even trim.
3. Skipping the Resting Period
After spending hours cooking your brisket, it’s tempting to dive right in once it’s done. However, skipping the resting period can cause the juices to escape, resulting in a dry brisket.
Solution: Allow the brisket to rest for at least 30 minutes after removing it from the heat. Tenting the meat with aluminum foil can help retain the heat and redistribute the juices throughout the brisket. For larger cuts, consider resting for up to an hour. This resting period is crucial for achieving a moist and tender final product.